Showing posts with label DIY for children. Show all posts

4/18/2019

Some long overdue Easter greetings

This blog is full of excuses for long periods of silence, but - as mentioned before - I consider using Instagram as my communication platform instead, and keeping the blog as a kind of projects library? Well, all this is stuff I think of in spare time, of which I sometimes don't have much.
I'm sure my readers have exactly the same kind of everyday issues....

Easter is upon us, and I actually always feel like colours and flowers and letting all that light in through the windows again - and making pretty things as decorations for Easter parties, or to give away with Easter eggs. This year I made these simple butterflies, they are perhaps the most basic origami I have ever shared here. Great for kids to make, or for impatient types like me. Or you?


I made bundles of them, and stuck a bit of thin wire through them, and put them on branches from our cherry trees, and it looked very charming. I did a small origami workshop in my workplace at the book shop, and several kids came by and folded with great enthusiasm. We used origami paper from Djeco, as seen in the photo, since we sell their really cool line of paper products. 

But maybe you feel like revisiting some of my older spring projects? 

There were the Sakura flowerballs - also made in a Buttercup version.
Last year, I made these colorful pleated Easter Egg Lanterns - and many of you liked those Cheerful Little Birds.

You can use my tag cloud to explore, there are plenty more. 
Have a lovely Easter or - if you don't celebrate Easter - simply a lovely spring!

11/23/2016

The start of Advent with Finn's Lanterns

These little diamond shaped lanterns will be my first Christmas gift for all the faithful paper DIY enthusiasts, who will be expecting at least a little project for the weekends, in the weeks to come. 

They are easy and fun to make, and I have named them after a friend of my son, who will sometimes get up very early in the morning, pick up a phone from his still sleeping parents, and find origami instruction videos on YouTube, and while away some quiet morning hours, folding and folding. Just my kind of kid! So thank you, Finn - I had never seen these before, and they look great. 

I made them into hanging ornaments, but they could be little gift boxes as well. And they could be hanging both ways - I just like the Chinese vibe they get in this version, with a little tassel. The string and tassel you could pull through with a needle, before you actually glue and close the form, that's a bit easier. I tied the little knots, after I had put the string in place. But check out the instructions. 

Get the PDF with the four different prints, and the folding instructions, right here.
 
2021: I have a new location for my downloads, go here for the four variants with tutorial (in Danish, but with easy-to-follow drawings)
Design 1
  /  Design 2  /  Design 3  /  Design 4 

Happy first of Advent!


3/31/2015

Not Very Egg Shaped Eggs

My son and I sent out an almost obscene amount of 'gækkebreve' or Easter fools letters - read more here - and the result is not yet quite certain, but we have to be prepared. We may have to cough up with a lot of Easter eggs this year. I like the pretty store bought hollow paper eggs a lot, but they cost almost more than the candy you fill them with, so I came up with these little boxes instead.

They are quickly made, and can contain a pretty generous handful of candies. I have made the print with four pretty spring like patterns, and instead of printing them on white, I played around with different colors I found in the drawer. I printed the boxes on the kind of cheap card stock you can buy everywhere, and that works well in most printers (= hobbykarton, thin cardboard / carton / cardstock: about 200 g).

Download the triangle sweet boxes PDF right here!

2021: I have a new location for my downloads, please go here:
Dragonflies box  /  Pine needles box  /  Cherry blossom box


1/06/2015

Epiphany or Twelfth Night and absolutely no more Christmas for now

Today, January 6th, is traditionally the last day for Christmas trees, elves and tinsel. We haven't quite gotten rid of all of it, but almost. Our tree is still in a corner, looking like a hung over drag performer or some such thing. It was more or less demolished on New Years Eve, where we had a fairly crazy dinner party, and the young ones sort of bombarded it with paper confetti poppers and glitter streamers. It survived, however, in an almost prettily trashy way. Now it is completely dried out, and I just know that if I attempt to lift it, every one of its needles will drop to the floor. Just couldn't be bothered today. Maybe tomorrow.

I will post the last Christmas reference for this season - this photo of a Christmas tree I took Saturday in SMK, the great art museum here in Copenhagen, where it was still standing in the beautiful sculpture hall, looking pretty. Two bits of cardboard can make a nice tree, indeed (no needles to worry about), and all the decorations are made in the children's workshop. I find it adorable.


With this, I will thank you all, for visiting the blog during November and December, and for all the nice feedback I have gotten on my creative projects this (= last) year. Keep coming back, if you feel like it, because I will be blogging on, as I did last year (for the first time), about all kinds of other topics that take my fancy.

So see you later, right?

12/19/2014

A teeny tiny crafting party for the young ones

We usually have a kind of party where we invite quite a lot of people over for Christmas paper crafting and general munching and beer / hot tea drinking, and it is usually one of my favorite kinds of Christmas get together, but somehow we forgot about it this year. When both my husband and my sister were going to their big office parties today, I decided to make a mini party for the remaining family. 

I sort of curated some projects for the two five year olds, with a pack of plastic straws and a lot of paper scraps. Since you can be certain that you can always get these two boys to put stuff on a string, I decided to make it simple for them. I punched a gazillion little flowers and cut the straws in bits, before the boys even got here. 

I absolutely insist on activities like these once in a while, even though LEGO and iPads are more appealing at five o'clock on a Friday afternoon. They stuck with it though, the little darlings. And my nephew even wore a tie. How cool is that?

They made glittery garlands and hanging trees. So pretty.


12/16/2014

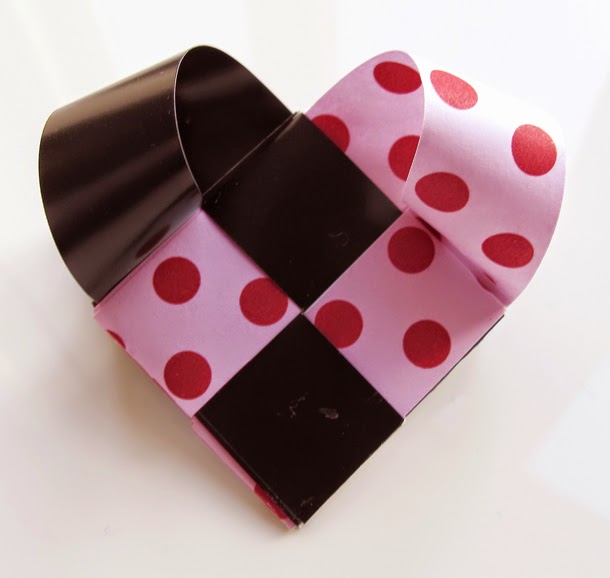
No Christmas without woven hearts!

Not on this blog, anyway. And since I have done so many of the traditional ones, especially back in 2011 (links here, at the bottom of the page), I thought you might like these. 

Just like the little project the other day, these are an alternative thing you can do with the Fröbel Star strips, and I think the older kids will like them too. You could also do them with ribbon (that needs to be a bit stiff and coarse), felt, plastic or leather like fabric. These here below, are made with four 15 x 50 mm. paper strips, folded in half, exactly as you need for a star.


If you can weave a Fröbel Star, these are super easy (much easier than stars) - but really, they are, even if you can't.

I have made a tutorial, and you can find it right here.

2021: I have a new location for my downloads, please go here:
page 1
  /  page 2  /  page 3 

Apologies for the murky images in the tutorial, but they were taken in lamplight, and that is always a tricky situation - but I assure you, they are cute and easy to make, and I hope you like them.
Bye for now.

12/09/2014

Easy Little Paper Wheels

Here in Denmark, Fröbel Stars are a very popular Christmas ornament, and I love making them, especially since the pre-cut strips now come in so many colors and patterns. I used to cut strips myself, to be able to make stars in crazy colors (strips used to come in white, silver and gold only), but no more. I have also painted them and decorated them in different ways.

I didn't start making these slightly complicated stars before I was all grown up, I never had the patience for them as a kid, and they are not for beginners. You can try them yourself, and you could get started with this tutorial! You can find several videos on YouTube, as well.

But back to the pre-cut strips, so widely available here in Denmark. I wanted to come up with a little simple ornament to make from these, so easy that my son (aged 5) could make them - and ended up with these rather cute little wheelie type things.


You make them from exactly two star strips, and a fun thing is that you can play around with how you hang them, as you can see above - either string them as beads, put a ribbon through the hole, or punch a hole for a thinner string in one of the folds.  

They derive from a very traditional ornament: Musetrapper in Danish or 'mouse ladders', or even 'cats ladders'. They are one of the the simplest types of garland you can make - if you need an explanation there is a fine tutorial here

To make the little wheelies, you make one small 'mouse ladder' from only two star strips, and trim the ends with glue. When that is dry, you press together the two square ends with a little more glue, to make the wheel. Voilà.

I made these with the different store bought strips I had, and here are their measurements if you need to cut some yourself: 25 x 860 mm., 15 x 500 mm. (the most common kind) and some 10 x 500 mm. for the tiny red ones (a bit to long for a good wheel, so trim these a bit). These super handy strips can be bought in all kinds of online DIY material shops, and are a must if you like to make Fröbel stars, and now wheels! Google for 'stjernestrimler'. They are inexpensive and will save you looots of time measuring and cutting - plus they have print on both sides, which is what you want for both stars and these types of folded things.

Musetrapper will often be the first kind of Christmas finery children in Denmark make. Along with the classic and universal paper ring garland. Here is a page from one of my old Christmas books:


What you often do, is have the children make lots and lots of the shorter bits, and then your kindergarten group or class will put them together to form a very long one, to hang across the entire classroom, or something like that (The photo above is from Gl. Estrup Herregård, from an attempt to make Denmarks longest 'mouse ladder').

This last image (from the Danish blog Reklamejam) is interesting. It is from last years Christmas season in Berlin, and taken in the &Other Stories shop (a favourite of mine, by the way), where these enourmous paper garlands were a part of the Christmas theme. They look very intriguing, like a kind of 'mouse ladders' but somehow... hexagonal? If anybody knows what they are, please let me know!

12/01/2014

Hey, it's December 1st! Let's make trees.

Hello everybody! It is December 1st, and Christmas is officially the theme of this blog for the next many weeks. I will try to post often, though perhaps not every day, and this year I will try to post a few projects especially for kids, or those of us who like very, very simple projects. 

So let us begin with one of those!
(And I do promise some comlicated-looking-but-actually-easy paper things as well, just as usual....)

For newcomers to this blog: My DIY's have a sort of general philosophy. They are nearly always paper designs, and simple and straightforward to make, though sometimes they require a steady hand. But that's about it. I try to do the thinking for you as often as possible, and usually you just have to print, cut and follow easy instructions. 

I start with something completely different, however, because already the other day, I talked about Hama Beads. And since we have been at them for weeks (they never leave the dining room table), I started making these little green trees, and the little plantation just grew and grew. We kinda like them, and my son, aged five, made the smaller ones. They just require a large square pegboard, and some counting skills. You could add colored beads for tree decorations and perhaps even add a star to the top. It's not that I in any way came up with this idea, but perhaps I made it a little bit simpler for you, if you save (it's just a gif) and print this diagram. 

They are a little bit different that the 'flat' Hama ornaments, and my son found it fascinating that it was so easy to make something 3D. We had a lot of different green colors, but they would look so cool in reds and pinks - or whatever you like!


4/25/2014

Easter came and went


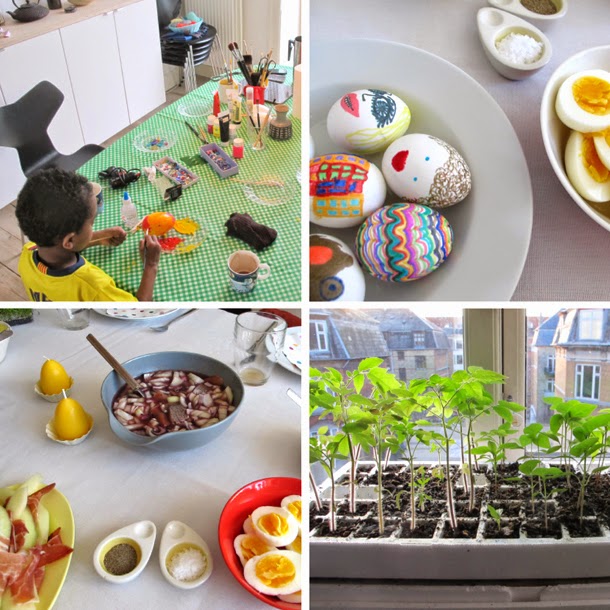
painting eggs  /  eating an awful lot of lunches  /  growing chilies and tomatoes  /  visiting Malmö and getting off the train at the beautiful Triangeln train station  /  those easter feathers everywhere  /  my sister in seasonal yellow  /  'fika' in the sun  /  lots of fudge  /  back in the garden with a vengeance  /  fritillaria are the cutest, weirdest flowers and tulips are always okay


4/07/2014

Easter Eggs

My four year old son made this one the other day. To me, of course, it rivals the splendour of any diamond encrusted Fabergé egg, and has star billing on the easter tree. Which is not much to show off, yet, by the way. I hope to post a nice, little easter-themed paper project to make, one of these days. Stay tuned...


If you enjoy decorating eggs, I have to show you some images, for inspiration! These photos have been in some corner of my 'beautiful things to keep' folder for years, and I am sad to say that I have absolutely no memory of where I found them - but I know that they are from the Ukraine, and they are from some old book of templates or ideas, for easter egg decoration. If you have more information, please leave a comment!

I think they are fantastic, and should you wish to see more easter eggs from eastern Europe, try this google search: 'pisanki' or even 'pysanki'. Also, I found this little article on different decorating techniques from the blog of the super cool New York-based design studio Kiss Me I'm Polish.


2/05/2014

Below zero fun

I am packing for our traditional, annual skiing trip to Sweden, and just can't wait to be up there in the cold, crystal clear winter air! We go with this other family we know, in a larger group of Danish cross country skiing enthusiasts. We share a cabin with our friends: four adults, three kids. I love skiing, and we all do - but of course, you can't ski 24/7. Books are read. Small, electronic screens are usually turned on, somewhere. We cook a lot of nice, sometimes complicated meals, eat sweets and drink wine in generous amounts, and it's not a health farm, exactly.
But healthy for the legs, and very healthy for the soul.

We also tend to improvise strange creative projects, such as the ice-and-marshmallow mobile we made outside the window last year. We had a theory about these marshmallows; thought they would deform in some interesting way, in the freezing cold - but they just turned sticky. 
The heavy ice baubles, however, were just gorgeous! Wonder what we'll come up with this year?


12/17/2013

The only useful thing I did today....

Was this hobbit sized garland to go with the hearts.


And here my son and his friend Edith are going at it with the punching thingies.
They also consumed large amounts of æbleskiver, sugar and jam.

12/18/2012

Flaky windows for the very lazy

The snowflake window, which I shared with you the other day here, and showed you last year here, demands that you put in some serious hours. But I found some alternative solutions for the lazy.
And it is so very, very okay to be lazy.

The first quick fix is from a Danish magazine, Alt For Damerne, using paper doilies.
The one in the middle is from Dutch sticker company Studio Haikje.
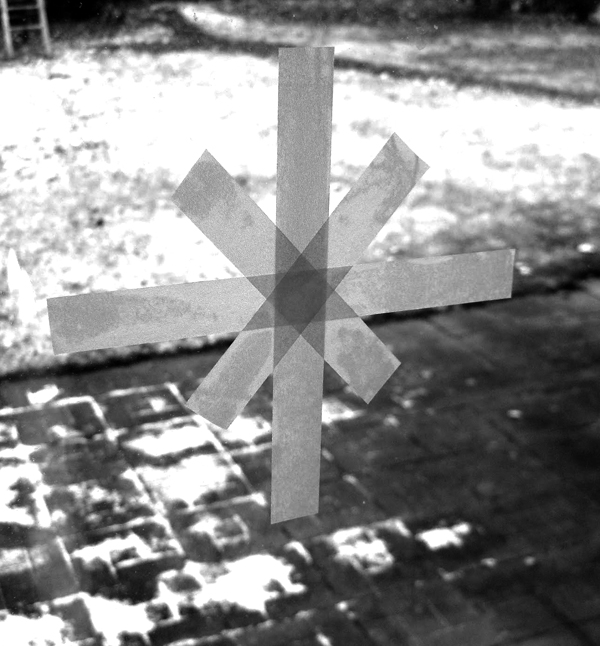
Tha last one I borrowed from the Danish blog Piger i Provinsen - the one with the masking tape.
I have seen this star in many versions around town, and I have seen fantastic, entire windows done
up in the most stylish way - very islamic architecture, very clever! See for yourself, here...

Making a quick christmas window is easy peasy. Nothing to it, as you can see.
I could easily see this tape idea developed a bit, with the zigzag scissors from the sewing drawer,
or simply cropping the ends diagonally, which would make the design even more starry or flaky.


And then I stumbled upon the Swiss designer Claudia Caviezel, a lady who has taken this media
to a completely new level.

She designed these patterns for room dividers in the Zürich airport business lounge.
And they are - masking tape stuck directly on enormous, layered glass panels! Cool.


12/11/2012

Work, work, work. And I mean this in a nice way.

This saturday we met for a proper, traditional klippeklistre-session. Lots of fun was had by all,
and everybody produced some really wow pieces. And ate a lot of food and sweets!

Here are a few samples: several angels with interesting outfits, the christmas rabbit (?), snowflakes,
the multicolor Pippi Longstocking Hama-ornament (and Hama-hearts, of course!), the afro angel,
the other afro angel, the disco pan flute, the neon star....
And lots of deep concentration!